Certificate maker guide: design, issue and verify
A certificate maker should do more than style a PDF. Follow these steps to design, bulk-issue and verify branded certificates that strangers can check.
Mia Carter
Co-founder & CEO, CertSeal

Most certificate advice starts with fonts, borders, and a signature line. That advice treats the certificate as a poster. A stranger who later holds the file still can’t tell whether the award is real, current, or even yours. A certificate maker should produce evidence, not just artwork. The logo and the cursive signature look official, and they prove almost nothing once the file leaves your inbox, because anyone can copy both.
So start with one question before you open a template: if an employer never emails you, can they still confirm this award?
A certificate is a claim, and the design is only how it’s presented. The part that matters to a stranger is the record behind it.
This guide follows a certificate from blank template to a checked credential. It covers what a certificate maker should actually produce, a step-by-step build for a branded design, the fields each certificate type needs, how verification methods compare, how to bulk-issue without duplicates, and the revocation rules to set before the first batch goes out.
What a certificate maker actually produces
A styled PDF proves very little. It shows what someone wanted the page to look like. It doesn’t show who issued it, whether you later withdrew it, or which exact claim you stand behind.
A working certificate maker returns three outputs, not one pretty file:
- A designed file: usually a PDF that people print, attach, and share.
- A unique verification URL: one permanent address per recipient, not a shared landing page.
- A QR code: it has to resolve to that same URL, including from a printed copy.
The design is the part people frame. The verification record is the part a stranger can check. On that record, the issuer, the recipient, the achievement, the dates, and the current status should be readable without an account.
Fraud makes the split urgent. In a 2025 YouGov survey of 526 UK HR decision-makers, commissioned by the degree-verification service Hedd (part of Jisc), 67% of large companies said job application fraud had increased, and 45% of large companies had found an applicant giving false information about their qualifications. Yet only 52% of large businesses said they check all academic credentials, against 37% of medium-sized firms and 29% of small ones. Most employers in the same survey, 63%, ask to see evidence of a qualification, such as a paper or digital certificate. That makes the certificate itself the thing employers check.
The pattern isn’t only British. In Checkr’s Hiring Hoax 2026 survey of 3,000 US managers involved in hiring, 60% said they had caught candidates falsifying work history, credentials, or references. Checkr sells background checks, so read it as a vendor survey, but the direction matches.
A logo and a signature line don’t close that gap. Both survive a screenshot. Neither updates when you revoke the award, and smaller employers are the least likely to chase you by email.
A public URL isn’t proof by itself. It has to open a record the issuer controls, whose status can still change.
Apply this test before you issue anything. Can a stranger confirm the issuer, recipient, achievement, issue date, and expiry without emailing you? If not, the certificate is a picture of an achievement rather than evidence of one. A valid record still doesn’t prove that the named person did the work, or that the skill is still current. It does prove that you issued that specific claim, and that you still stand behind it.
How to create a branded certificate, step by step
Brand work is the easy part, and it still fails when the title is vague or the longest name overflows the border. Build one master design, then let fields do the personalization.
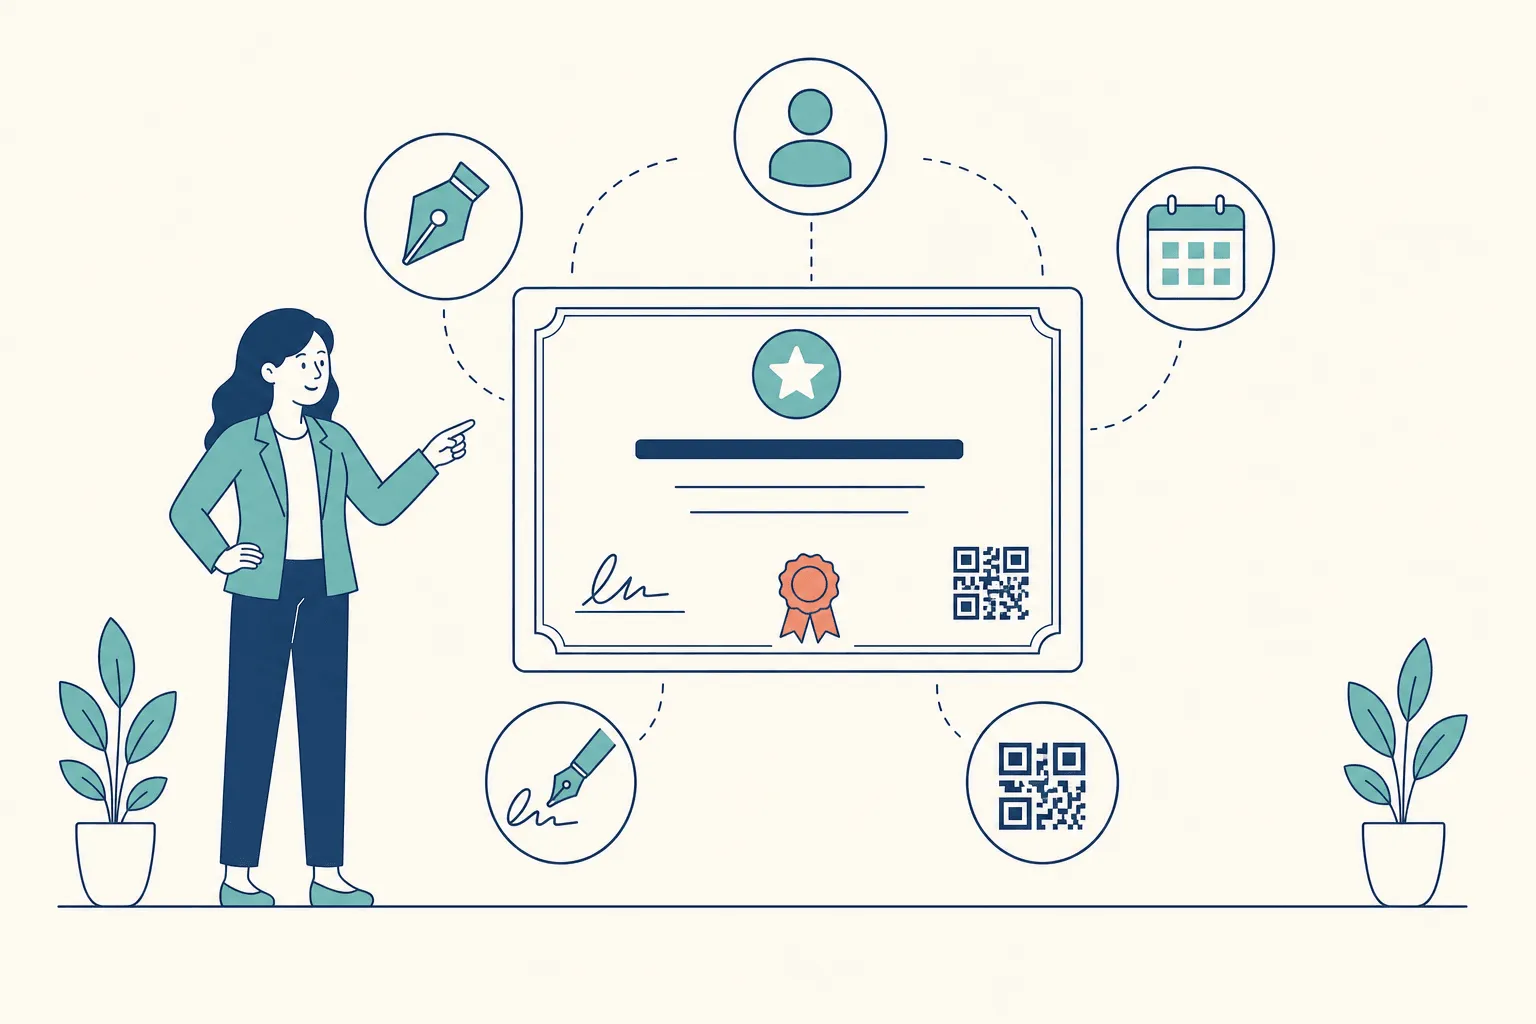
- Pick a template that matches the award type. Completion, participation, and appreciation layouts aren’t interchangeable. The common slip is grabbing the prettiest border and forcing every program into it. The template library is sorted by award type for this reason, and how to design a certificate covers the spacing and hierarchy choices that still read after printing.
- Replace the placeholder title with the exact achievement. Write “Advanced Trauma Life Support, 2026 cohort,” not “Certificate of Completion.” A generic title forces the verifier to guess what was earned. The slip is leaving the template’s sample title on the live file.
- Upload the logo and lock the palette. Use the same fonts and colors on every batch, so a second certificate from your organization looks related to the first. Place the mark in the header or the seal, not over the name. The slip is a low-resolution logo that pixelates at print size.
- Add the accountable person’s signature on a transparent background. A white box behind the signature fights the paper color and looks pasted on. The transparent signature maker turns a photo of a pen signature into a clean PNG. The slip is signing as a brand rather than as a named person in a named role. The signature supports the design. It isn’t the proof: as NIST’s guidance on cryptographic standards, SP 800-175B Rev. 1, puts it, “digitized signatures can be forged or duplicated, and can be appended to other electronic data.”
- Insert dynamic fields instead of typed names. Use placeholders such as
{{recipient_name}}so one design produces a personal file for every row. Typing even one real name into the master means that name turns up on the next cohort’s certificates. - Add the issue date, and an expiry date when the training is time-limited. Format both the way the accrediting body expects, including the order of day and month. The slip is a US-style date on a certificate that a UK body will read the other way around.
- Preview with the longest name you expect, then export. Print one copy and scan the QR code from arm’s length. The slip is previewing only “Jane Smith,” then discovering that “Christopher Montgomery-Singh” collides with the border.
What the finished page should look like
One page, legible at print size. The recipient’s name is the largest text after the title. The margins survive a home printer. The QR code sits in a quiet corner with enough empty space around it to scan. If the recipient will frame the paper copy, the code still has to work through the glass and at an angle, so test it that way before the batch goes out.
Practical rule: if you can’t read the name, the title, and the date on a printed page held at arm’s length, the design isn’t finished.
Recipient fields and template types to get right
Match the program to a template before you touch color. The fields are the contract, and the design only displays them.
| Purpose | Template to use | Fields that must be filled |
|---|---|---|
| Course completion | Completion | Name, course title, completion date, CPD hours, and an expiry if time-limited |
| Training attendance | Participation | Name, training title, session date |
| Professional certification | Course or Training | Name, credential title, issuer, issue date, unique ID, and an expiry if accredited |
| Event attendance | Participation or Recognition | Name, event title, event date |
| Speaker appreciation | Appreciation | Speaker name, event title, talk title |
| Award or recognition | Award or Achievement | Name, award title, reason, date |
| Employee of the Month | Employee of the Month | Employee name, month, department |
The two fields people leave blank
The award reason is the first. “Excellence Award” tells a verifier nothing. “Excellence Award for cutting onboarding time on the night shift” names the achievement. Without that line, two awards from the same ceremony look identical, and the recipient can’t explain the certificate six months later. If you’re stuck for a title, the award title generator and the certificate wording generator give you a starting line to edit.
The expiry date is the second, and only where the credential is time-limited or accredited. A one-day workshop doesn’t need one. Regulated CPD and a professional certification usually do. Leaving it blank on those programs makes a lapsed credential look open-ended.
A unique certificate ID and the issue date are how a verifier tells two similar files apart, so neither should be optional in a batch. Treat the ID as a reference for people, not as a password. If anyone can look a certificate up by typing 1001, then 1002, the lookup leaks your recipient list. The verification link itself should carry a long, random token that nobody can guess.
CPD certificates need the learner’s hours on the page. Event attendance needs the event name and the date, not a course outline. Speaker and appreciation certificates can share a short field list and change only the title line: conference delegates get attendance certificates, and speakers get a separate title with the talk name included. The CPD certificates and event certificates pages show how those layouts differ.
Check the field list against the accrediting body’s rules before you build the template. A field added after issuance means going back to every certificate you’ve already sent.
Verification methods compared
Four formats get handed to employers. They aren’t equal once someone tries to check them.
| Method | What a stranger can confirm without contacting you | What it can’t show |
|---|---|---|
| Static PDF | Nothing, unless the file is digitally signed | Whether you later revoked it |
| Image file (PNG or JPG) | Nothing | Who issued it, or whether it still stands |
| Printed certificate with a QR code | The record behind it, if the code opens one you control | Anything, if the code leads to a static page |
| Signed credential with a live record | The issuer, the exact claims, and the current status | Whether the person actually did the work |
What fails for high-stakes awards
A digitally signed PDF proves the file hasn’t changed since it was signed. It can’t tell a verifier that you withdrew the award last month unless they also check a status record, and its claims are locked inside a page layout that software can’t read. An image file is worse for proof: it forwards cleanly and never updates.
A QR code only helps when it opens a record you control. A code that points at a marketing page, or at a PDF that never changes, is a shortcut to a picture. Dynamic QR codes for verifiable credentials explains what the code should point to. For licenses and regulated CPD, pair the printed certificate with a signed credential and a live record: a structured file such as an Open Badges 3.0 credential, signed by the issuer, whose status a verifier can check. Treat the PDF as the copy the recipient frames, not as the proof.
The digital certificate verification process is something a stranger should be able to finish alone. A good verification page shows the issuer, the recipient, the achievement, the dates, the certificate ID, and the current status. It has to open from the printed QR code, and the visitor shouldn’t need an account.
Be clear about the limit, too. A valid record shows that the issuer issued the credential. It doesn’t show that the person did the work, and it doesn’t show that the skill is still current. Say so in your own policy, so employers don’t treat the page as a background check.
How a recipient or employer checks a file

- Scan the QR code, or type the printed URL.
- Confirm that the issuer, recipient, achievement, issue date, and expiry date match the document in hand.
- Look for a revocation notice. A revoked certificate can still look perfect on paper.
- If the URL doesn’t open a live record, treat the certificate as a picture and ask the issuer to confirm it.
If the page and the paper disagree, believe the page.
Bulk issuance without duplicates or lost records
The most expensive failure in a large cohort is a duplicate: two valid certificates for one achievement, both scannable, with different IDs. Design didn’t cause it. A retry did. Reliability depends far more on careful data handling than on the template.
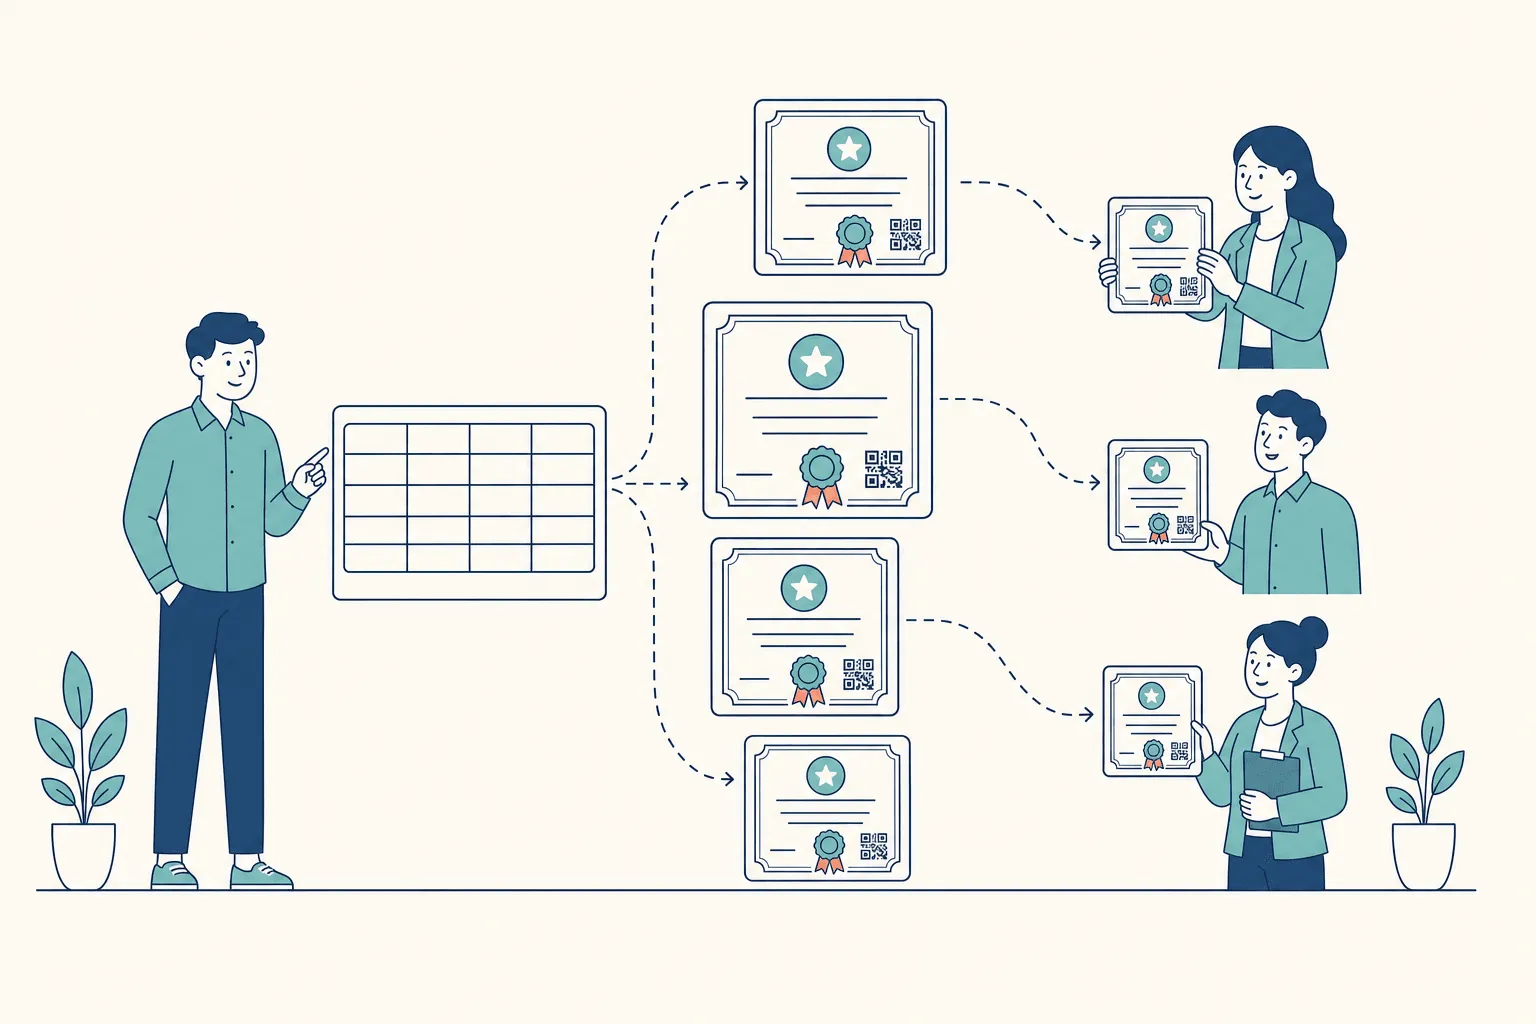
The pipeline, in order
- Validate the source. Check the CSV, spreadsheet, or API payload so that missing names and malformed dates stop before any certificate is drawn.
- Normalize names, dates, and IDs. Use one date format, trim stray spaces, and agree on what an empty field means.
- Catch duplicate recipients before rendering. Do it on the data, not by eyeballing the preview.
- Give each issuance a stable key. A retry must not mint a second valid credential. That key is the difference between “send again” and “issue again.”
- Generate the credential from the structured data, not from a flattened image.
- Save the record before any email goes out. If the email sends first and the save fails, the recipient holds a QR code that leads nowhere.
- Queue delivery and retry failures with a pause. A single timeout shouldn’t freeze the cohort or send the successful ones twice.
- Reconcile sent, failed, retried, and revoked rows in one list that an operator can read.
For a cohort coming from a spreadsheet, the Excel certificate generator path is upload, map the columns to fields, preview, then send. In CertSeal, any extra column in the file becomes a field you can place on the certificate, so a cpd_hours column prints as {{cpd_hours}}. The import preview flags rows whose email appears twice in the file or is already in the batch, and skips them unless you choose to keep them.
The same checks apply when certificates come from the REST API, Zapier, or Zoom. Automations retry, so give each certificate an ID that comes from your own records, such as the enrollment ID. CertSeal accepts your own certificate ID and rejects a second certificate with an ID that’s already in use, which turns an accidental retry into an error you can see instead of a duplicate a recipient can share.
Small corrections and big ones need different handling. Fixing a misspelled name on the right person’s certificate is an edit, and the certificate should update at the same link. Issuing to the wrong person, or for the wrong achievement, needs a revocation and a new certificate, so the record shows what happened.
Track validation failures, duplicates blocked, delivery failures, bounces, and how long a batch takes. Email opens tell you about engagement. They don’t tell you whether a credential is valid.
| Symptom | Likely cause | Fix |
|---|---|---|
| Same recipient receives two certificates | A retry without a stable certificate ID | Use one ID per issuance, revoke the duplicate, and keep the original |
| Blank name on some certificates | Column header mismatch or an empty cell | Check the import preview and the column mapping before sending |
| Dates printed in mixed formats | Several date formats in one sheet | Normalize all dates to one format before importing |
| Emails show as failed or never arrive | Bounced or mistyped addresses | Correct the address and re-send from the batch |
| Certificate issued but QR code fails | The record was saved after the email went out | Save the record first, then send |
Set revocation rules, then send your first batch
Three decisions belong in place before any certificate leaves the system. Skip them and the first correction becomes a mess of overwritten files.
Name who can revoke, and record why. A corrected certificate for the wrong person or the wrong achievement is a new record, not a silent edit of the old one. The idea is borrowed from public-key infrastructure, where NIST’s guidance notes that certificates may be revoked before their expiry date, with the revoked ones identified on a certificate revocation list. Learning credentials need the same discipline. Record the affected credential, the date, and the reason, and revoke promptly once you know you must. When the record and the paper disagree, the verification should side with the record.
Separate revoked from expired. An expired certificate can still be genuine. A revoked one isn’t. A verifier needs to know which applies, so print the expiry date clearly and make sure a revocation shows on the record itself, not only in your spreadsheet.
Be clear about who vouches for the content. A platform can show who issued a certificate and whether it still stands. It can’t know whether the learner earned it. That rests on your criteria, your assessment records, and the person who approved the batch.
Run ten recipients before the cohort
Build the template and map the fields with ten sample rows, including a long name, a missing optional field, and a time-limited expiry. Read the preview, fix the sheet, and run it again. Only then send the first real batch.
Each recipient in a batch becomes one certificate with its own permanent verification URL. The email should use the recipient’s name, name the achievement, link to that page, and explain how to download the PDF. Compose it from a template you’ve previewed with sample data, then attach that template to the batch. The certificate email delivery page covers branded templates and sending from your own address.
A receiving server accepting the message only shows that your system released it. An open is a later, optional event. Neither one proves the credential is valid. Check failed deliveries within a day: a bounced address is a certificate nobody can find, and waiting a week turns a typo into a support ticket.
Where CertSeal fits
CertSeal is built for training teams that want every certificate to carry its own verification page and a QR code that anyone can check, even from a printed copy. You design in the certificate maker from a template or your own background, place fields such as the name, dates, certificate ID, and a QR code, and set how dates print for each batch.
Issuing happens in batches from a CSV or Excel file, the API, Zapier, or Zoom. Every recipient gets a certificate page with a PDF download, reached through a link with a random token, and no account is needed to open it. Delivery statuses show which emails were sent and which failed, so you can fix an address and re-send.
When something goes wrong, you can revoke a certificate from the dashboard or the API, with an optional private reason. The page then tells anyone who opens it that the issuer revoked the certificate and when, the PDF stops downloading, and any queued email is cancelled. On the Plus and Professional plans, each certificate can also be downloaded as an Open Badges 3.0 credential, signed with your organization’s own key, which covers the “signed credential with a live record” row in the table above. The Open Badges guide explains the setup.
The boundaries are worth knowing as well. The PDF itself isn’t digitally signed. An expiry date prints on the certificate, but the page doesn’t switch to “expired” when that date passes, so the printed date is what a verifier reads. And CertSeal records who issued a certificate, not whether the learner deserved it.
Frequently asked questions
What is a certificate maker?
A certificate maker is a tool for designing certificates and filling them with each recipient’s details. A basic one exports a styled PDF. A complete one also gives each certificate its own verification page and QR code, so anyone holding the file can confirm who issued it and whether it still stands.
How do I make a certificate that people can verify?
Give every certificate a unique URL that opens a record you control, print a QR code that leads to the same URL, and show the issuer, recipient, achievement, dates, certificate ID, and status on that page. Then test it: print one copy and scan it with a phone that has never seen the link.
What fields should every certificate include?
At minimum: the recipient’s name, the exact achievement, the issuing organization, the issue date, and a unique certificate ID. Add an expiry date for time-limited or accredited training, CPD hours where they apply, and a reason line for awards.
Can I bulk-create certificates from a spreadsheet?
Yes. Build one design with fields, upload a CSV or Excel file, map each column to a field, preview a few rows, and send. Check for repeated recipients before you send, and keep one certificate ID per issuance so a retry can’t create a duplicate.
What’s the difference between an expired and a revoked certificate?
An expired certificate was valid and has reached the end date the issuer set. It’s still genuine, just no longer current. A revoked certificate was withdrawn by the issuer, for example because it went to the wrong person, and shouldn’t be relied on at all.
Is a free certificate maker good enough?
For a single certificate or an informal event, often yes. The free online certificate maker produces a finished certificate without an account. Once you issue to cohorts, need certificates that strangers can verify, or might have to withdraw one, you need per-recipient records, bulk issuing, and revocation.
The short version
A certificate maker earns its place after the file is sent, not before. Choose a template by award type, write the exact achievement, fill every field from data, and test with the longest name and a printed QR code. Then make sure each certificate opens a live record, issue in batches that can’t duplicate on a retry, and decide who can revoke before the first one goes out.
CertSeal lets training providers, associations, and employers design certificates, issue them in bulk with a verification page and QR code for each one, and revoke them when they need to. Build a design in the certificate maker, issue a cohort with the bulk generator, or compare plans on the pricing page.
Start free with CertSeal — 100 verifiable certificates a year, no credit card.
Related reading
- How to design a certificate that looks professional — page setup, hierarchy, and a pre-flight checklist
- Digital certificate verification process guide — what a verifier checks, step by step
- Dynamic QR codes for verifiable credentials — what the code on a certificate should point to
- How to issue digital certificates — the end-to-end issuing process
- Online certificate maker guide — how to compare certificate makers before you buy
- Digital certificate software: 10 tools compared — platforms side by side on design, issuing, and verification
Keep reading
Certificates
Digital certificate software: 10 tools compared
Compare 10 digital certificate software platforms on design, bulk issuing, verification, integrations and pricing, plus a test to run before you buy.
Badges
Digital badging software explained for issuers
How digital badging software works, what Open Badges 3.0 changed about verification, and what issuers should test before choosing a platform.